This guide explains how to use the inventory module: tracking your stock of mouldings, mats and accessories, recording the materials consumed when you build a framed item, and preparing, sending and receiving purchase orders.
How quantities are counted
The module counts each kind of item in the unit you actually buy and use it in:
- Mouldings are counted in linear feet or meters (matching your store's measurement setting), the same unit as the cost per foot/meter in your catalogue.
- Mats are counted in sheets, using the sheet size already on each mat's record.
- Other items (glass, backing, tape, wire, hangers and anything else you order) are counted in pieces.
A quantity is intentionally allowed to go below zero and is treated as low stock, so it is automatically picked up the next time you prepare a purchase order.
Finding your way around
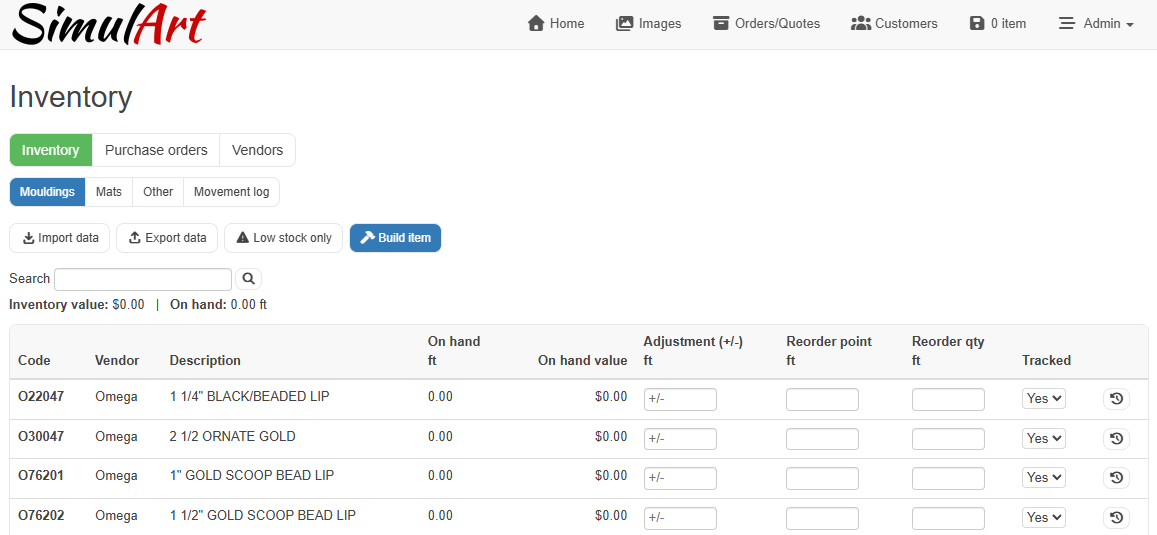
The top row of buttons switches between the three areas of the module: Inventory, Purchase orders and Vendors. On the inventory page, a second row of smaller buttons selects what you are looking at: Mouldings, Mats, Other or the Movement log.

The inventory lists
Each tab shows your items with, from left to right: the code, vendor, description, sheet size (mats only), the quantity on hand, the On hand value (quantity × cost), an adjustment box, the reorder point, the reorder quantity, and whether the item is tracked.
- On hand is the current quantity in stock.
- Adjustment (+/-) lets you correct a quantity directly: type '+12' or '-3.5' and click Save changes or hit enter. Every adjustment is recorded in the movement log under your user name.
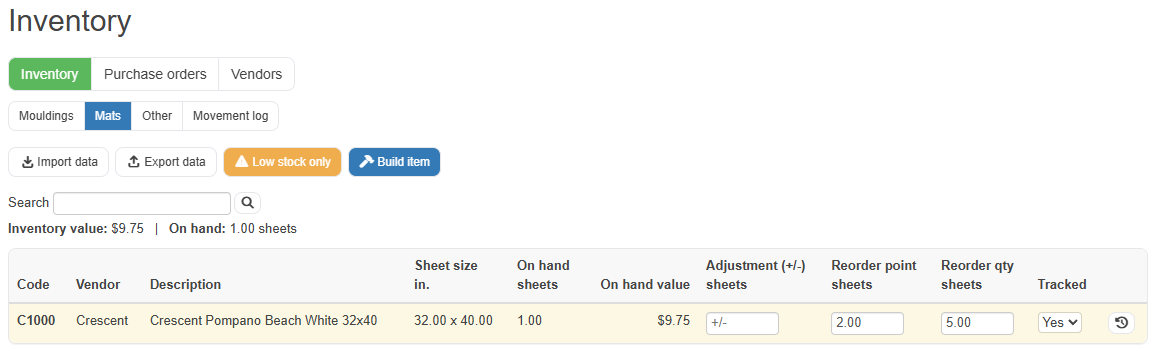
- Reorder point is the level at which the item should be reordered. When the quantity on hand falls to or below it, or goes negative, the row is highlighted in yellow.
- Reorder qty is how much you normally order at a time. It becomes the suggested quantity on purchase orders. If you leave it empty, the system suggests enough to bring the stock back up to twice the reorder point.
- Tracked controls whether the system watches the item: untracked items are never highlighted and never suggested on purchase orders, but their quantities still update normally.
Use the search box to find items by code, vendor or description, and the Low stock only button to see just the items that need attention.
Items disabled in your catalogue (availability set to 0) do not appear in the lists.
Setting your starting quantities
You can type adjustments line by line, but for the initial count the CSV import is faster.
1. On the tab you want to update (Mouldings, Mats or Other), click Import.
2. The import page opens with a drag & drop zone. Drop your CSV file on it, or click to choose the file, it uploads automatically.
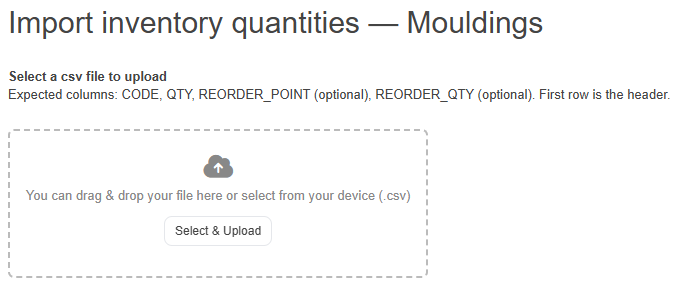
The file needs a header row, then one line per item: 'CODE, QTY', and optionally 'REORDER_POINT', 'REORDER_QTY'. The QTY is the absolute quantity on hand (not a change). Codes that don't exist in your catalogue are skipped.
The Export button on each tab downloads the current inventory as a CSV. An exported file can be edited and re-imported as-is: the import reads the column headers, so the vendor and description columns in the export are ignored safely.
Building an item
When you assemble a custom framed piece, click **Build item** on the inventory page. This deducts all the materials in one operation and records the total cost of what you built.
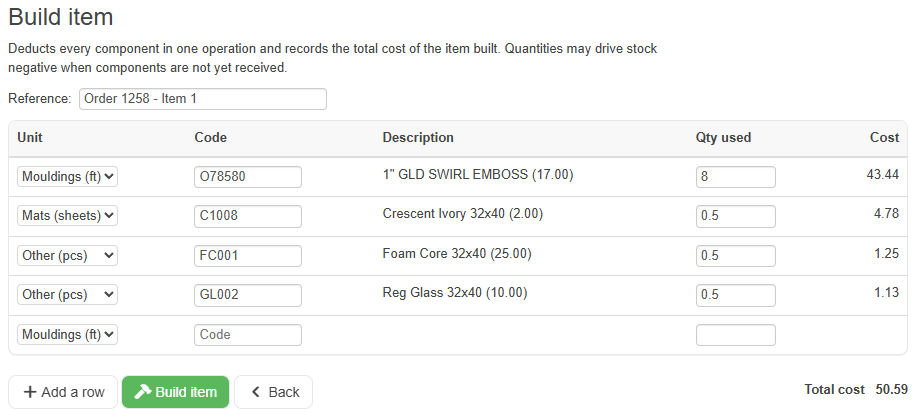
1. Enter a Reference, typically the order number or job name.
2. For each component, pick the type (moulding, mat or other), then start typing the code: a dropdown suggests matching codes as you type. Pick one with the mouse or the arrow keys and Enter. The description, current stock and cost fill in automatically.
3. Enter the quantity used, the length of moulding in feet/meters, the fraction of a mat sheet, the number of pieces. The line cost and the running Total cost update as you type.
4. Five lines are shown; click Add a row if you need more.
5. Click Build item to record it.
Every component deduction appears in the movement log with the reason 'build' and your reference, and the build itself with its total cost is listed under Recent builds at the bottom of the page. If a component wasn't in stock, its quantity goes negative and the item shows up in the low-stock filter, ready for your next purchase order.
The movement log
The Movement log tab is the full history of every stock change: date, code, unit, the quantity change, the resulting quantity, the cost of the change (quantity × the item's cost at that moment), the reason, a reference, and the user who made it.
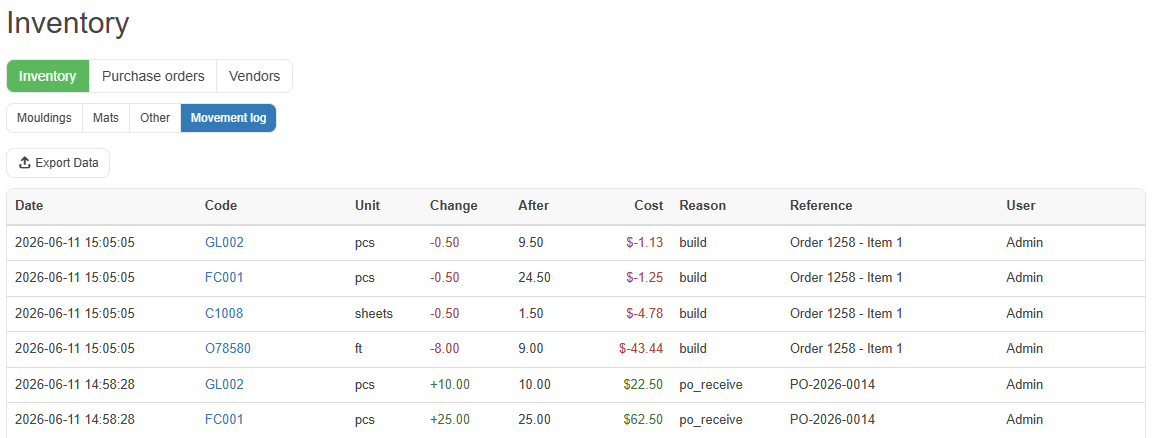
Reasons you will see: 'manual' (adjustment on the inventory page), 'csv_import', 'build', 'po_receive', and 'correction'. Automatic entries are posted by 'system'. Click any code to filter the log to that item's history.
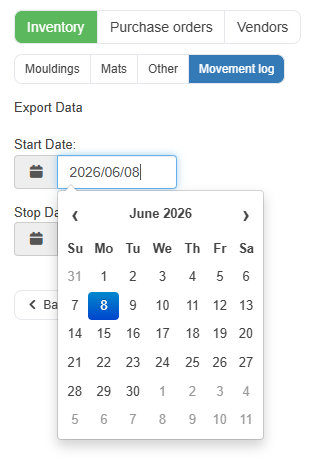
Export Data opens a date-range form: pick a start and stop date (or leave them blank for everything) and click Export to download the log as a CSV. If you filtered by a code first, the export keeps that filter.
Vendors
The Vendors page lists your suppliers with their contact name, email, telephone, address and notes, editable directly in the table, with a top row to add a new one. Sync from catalogue pulls in any vendor name present on your mouldings or mats that isn't listed yet.
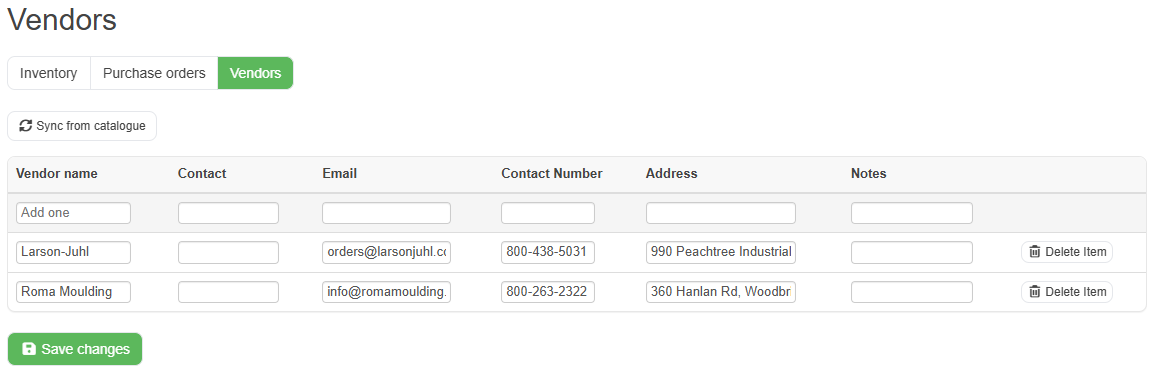
The email entered here is what the purchase order pages use when you email a PO to a vendor.
Creating a purchase order
Go to Purchase orders and click New purchase order.
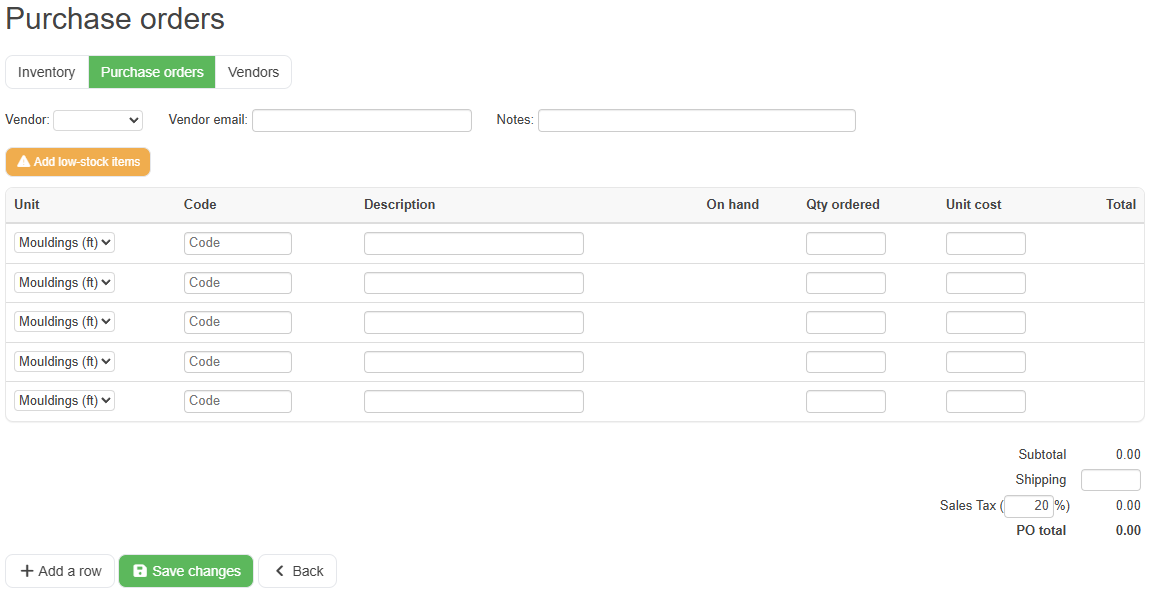
- Pick the vendor, their email fills in automatically from the vendors page.
- Add lines: choose the type (Mouldings, Mats, Other or Items sold), type the code (the same suggestion dropdown helps here), and the description, cost and quantity on hand fill in. Enter the quantity to order; the line total and the totals at the bottom update live. Items sold behaves a little differently and is covered in the next section.
- Add low-stock items fills the order with everything currently low for the selected vendor (or for all vendors if none is selected), with suggested quantities, mouldings in feet/meters, mats in sheets, accessories in pieces.
- Shipping and the tax rate are edited in the totals block at the bottom right. The tax rate defaults automatically.
- Add notes if needed, then Save changes. The order gets a number like PO-2026-0012 and is saved as a draft.
Drafts can be reopened and edited freely until they are marked as sent.
Ordering items on customer orders
Sometimes a PO line isn't a moulding, mat or accessory from your inventory, it's a finished piece a customer has already bought that you need a vendor to produce or supply. The Items sold line type is made for that: it pulls the product straight off a customer's order so the vendor sees exactly what was sold, with a picture.
Items sold are never part of your inventory. They are not counted, not tracked, and not changed when you receive the delivery, they are simply a way to put an already-ordered product onto a PO.
- On a line, set the type to Items sold. The code box turns into an order number box with up and down arrows beside it.
- Type an order number directly, or use the arrows to step through the orders with a status that qualifies (order pending & order in production). One arrow moves toward more recent orders, the other toward older ones.
- If the order has a single item it is selected automatically. If it has several, a picker opens showing each product with its thumbnail, choose the one you want.
- The line code becomes the order number and the item's position on that order, for example 1043-2 for the second item on order 1043. The description fills in with the product's name and details, and you can edit it.
- There is no catalogue price for a sold item, so type the unit cost yourself. No "on hand" quantity is shown, sold items aren't stocked.
Working with a purchase order
Opening a PO shows its details, the line items, and the totals, subtotal, shipping, sales tax and total are always displayed.
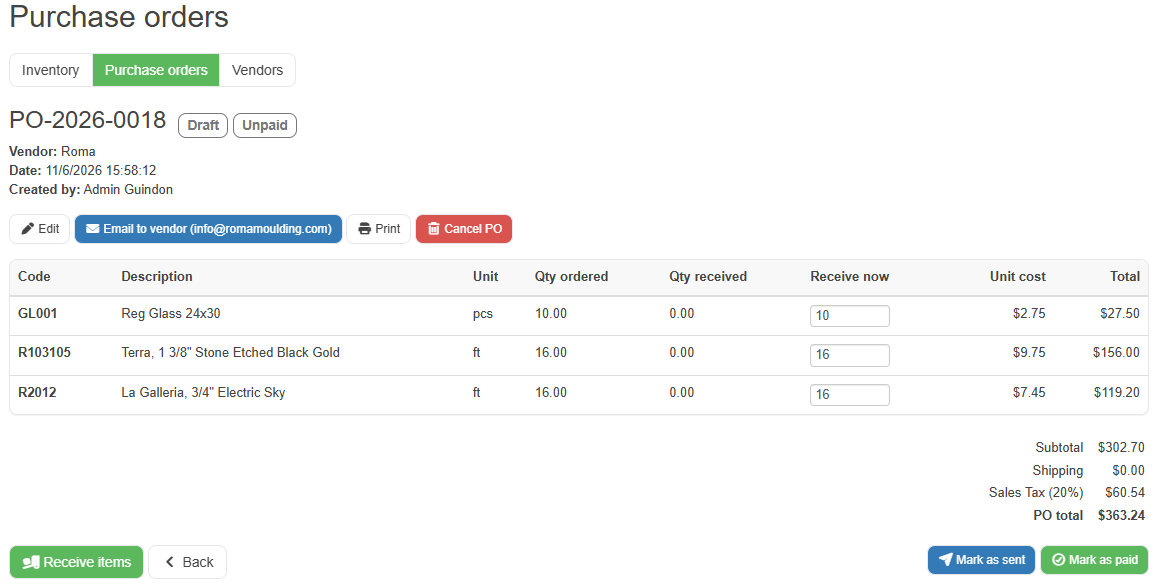
From the top buttons you can Edit (drafts only), Email to vendor, Print (opens a clean printable page with your company letterhead and the vendor's details), or Cancel. The bottom row holds Receive items and Back on the left, and Mark as sent plus the paid/unpaid toggle on the right.
- Email to vendor sends the PO through your store's email template to the address on the order, and marks a draft as sent.
- Mark as sent records that you transmitted the order some other way (phone, fax, the vendor's website).
- Mark as paid / Mark as unpaid tracks payment; the badge shows on the list and the printout.
The Export Data button on the PO list downloads all purchase orders in a chosen date range as a CSV, with their totals and statuses.
Receiving a delivery
Open the purchase order and look at the Receive now column: it is pre-filled with each line's outstanding quantity, so if the whole delivery arrived you simply click Receive items. Items sold lines are skipped when you receive, since they were never in your inventory, receiving a delivery only ever adjusts mouldings, mats and Other stock.

For a partial delivery, change the numbers to what actually arrived (blank a line that didn't come) before clicking. Stock increases immediately, mouldings in feet/meters, mats in sheets, and Other lines into the Other tab (created automatically the first time you buy something new). The order's status moves to Partially received or Received on its own, you can never receive more than was ordered, and every receipt is in the movement log against the PO number.
The replenishment cycle at a glance
1. You build framed items, components are deducted, costs recorded.
2. Consumed components fall to or below their reorder point (or go negative) and show as low stock.
3. New purchase order → Add low-stock items drafts the order per vendor with suggested quantities.
4. You email or print the PO and mark it sent and, later, paid.
5. The delivery arrives and you receive it, stock comes back up and the cycle repeats.
Good to know
- Item descriptions follow the language you are working in: if a second-language description exists on the item, it is shown when the admin is in that language. The description saved on a purchase order is in the language the order was created in.
- All amounts are shown in your store currency, and dates use the same format as the orders pages.
- The yellow highlight is the low-stock signal.
- Quantities below zero are allowed.
Was this article helpful?
That’s Great!
Thank you for your feedback
Sorry! We couldn't be helpful
Thank you for your feedback
Feedback sent
We appreciate your effort and will try to fix the article